· 先是一段吐槽
这次的内容来自于一个很常见的需求
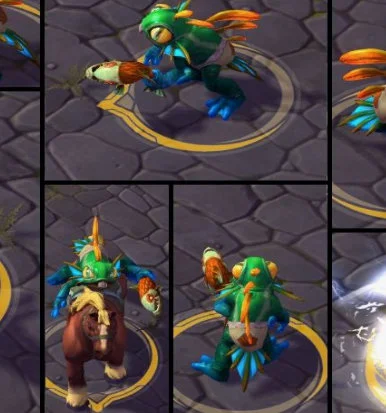
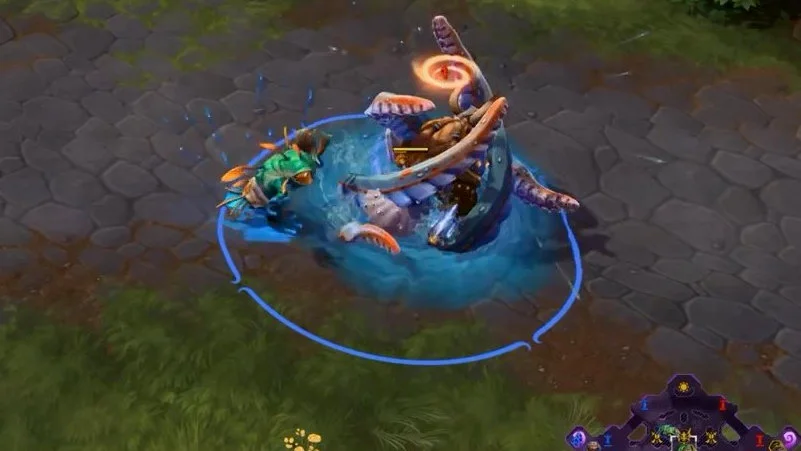
攻击预警圈
对应的英文翻译我搜的时候还猜了一会,Attack Area、Warning Area、Warning Circle等等等,后来才发现,似乎是Skill Indicator
策划说,这东西啊,要贴地的
有道理,我看看隔壁手游,技能预警圈都是贴地的,毕竟地面是平面,贴不贴地也就是高度的问题,没有ZFighting问题就结束了。
嗯?我们是Terrain捏过的山地,所以,得用Projector?
不
端游还能考虑考虑要不要用,手游的话,深度图都已经想办法避免使用了,怎么能败在Projector上(关于为什么不想在手游上使用Projector,下次有机会再细说吧,我得再找找资料)
不用归不用,该有的效果还是得有,既然不能用官方的,是不是可以自己弄个类似的
说不定还真可以
虽然不能直接用Projector,但可以用Projector的实现方法来炮制一个定制功能
简单来说就是
1.把技能预警效果预渲染到一张RenderTexture里
2.把这张RT传入地面的shader计算中,uv用视角变换计算来渲染到对应的位置上
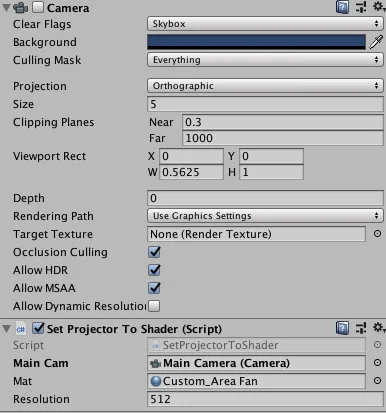
这里有个潜在的问题,要获得视角变换矩阵就得有摄影机,而多了一个摄影机又变相增加了渲染成本,不过其实这里的摄影机只是用于提供矩阵信息,不需要摄影机画面,那其实用游戏中现有的MainCamera来提供需要的信息就可以了
· 进入正题吧
首先准备一个技能预警效果的mat,这个mat的shader本身没有特殊的要求,按照美术效果来实现就好,不同的预警效果可以制作多个Prefab,替换材质加载就可以了

我在shader里做了按角度切割控制和从中心扩散波形两个功能,动画的时机交给战斗部分来控制
这个就是Shader1了
· Shader1 To RenderTexture
using System.Collections;
using System.Collections.Generic;
using UnityEngine;

[ExecuteInEditMode]
public class SetProjectorToShader : MonoBehaviour
{
  public Camera mainCam;
  public Material mat;
  public int Resolution;

  Vector2 scale;

  private void Start()
  {
    if (GetComponent<AudioListener>() != null) GetComponent<AudioListener>().enabled = false;
    mainCam = GameObject.FindGameObjectWithTag("MainCamera").GetComponent<Camera>();
  }

  private void Update()
  {
    if (GetComponent<Transform>().parent != null)
    {
      scale.x = GetComponent<Transform>().parent.localScale.x;
      scale.y = GetComponent<Transform>().parent.localScale.z;
      Shader.SetGlobalVector("_SkillIndicatorSize", scale);
    }
    else
    {
      scale.x = GetComponent<Transform>().localScale.x;
      scale.y = GetComponent<Transform>().localScale.z;
      Shader.SetGlobalVector("_SkillIndicatorSize", scale);
    }
  }

  private void OnDisable()
  {
    Shader.SetGlobalFloat("_SkillIndicatorOffOn", 0);
    if (!mainCam) return;
    mainCam.GetComponent<UpdateProjectorRT>().RenderOffOn = false;
    mainCam.GetComponent<UpdateProjectorRT>().ReleaseRT();
  }

  private void OnEnable()
  {
    mainCam = GameObject.FindGameObjectWithTag("MainCamera").GetComponent<Camera>();
    mainCam.GetComponent<UpdateProjectorRT>().cam = this.GetComponent<Camera>();
    mainCam.GetComponent<UpdateProjectorRT>().mat = this.mat;
    mainCam.GetComponent<UpdateProjectorRT>().Resolution = this.Resolution;
    mainCam.GetComponent<UpdateProjectorRT>().CreateRT();
    mainCam.GetComponent<UpdateProjectorRT>().RenderOffOn = true;
  }
}
这个脚本负责收集位置信息、缩放信息和材质信息,然后传给后面用于刷新RT的脚本,这个脚本挂在投射器物体上,同时物体上需要增加一个摄影机组件,这个摄影机不需要打开,只要设置好ViewPortRect的比例成1:1来正确计算投射位置就可以了
· RenderTexture To Shader2
using System.Collections;
using System.Collections.Generic;
using UnityEngine;

[ExecuteInEditMode]
public class UpdateProjectorRT : MonoBehaviour
{
    RenderTexture renderTexture;
    public Texture TestTexture;
    public bool testTextureOffOn;
    public int Resolution;
    public Material mat;
    public Camera cam;
    public bool RenderOffOn;

    int SkillIndicatorMainTexID;

    private void Start()
    {
        SkillIndicatorMainTexID = Shader.PropertyToID("_SkillIndicatorMainTex");
        RenderOffOn = false;
        testTextureOffOn = false;
        Resolution = 512;
    }

    private void OnPreRender()
    {
        if (!RenderOffOn) return;
        if (testTextureOffOn)
        {
            Matrix4x4 projMatrix = cam.projectionMatrix * cam.worldToCameraMatrix;
            Shader.SetGlobalMatrix("_ProjectionMatrix", projMatrix);
            Shader.SetGlobalTexture(SkillIndicatorMainTexID, TestTexture);
        }
        else
        {
            Graphics.Blit(null, renderTexture, mat);
            Matrix4x4 projMatrix = cam.projectionMatrix * cam.worldToCameraMatrix;
            Shader.SetGlobalMatrix("_ProjectionMatrix", projMatrix);
            Shader.SetGlobalTexture(SkillIndicatorMainTexID, renderTexture);
        }
    }

    public void CreateRT()
    {
        renderTexture = new RenderTexture(Resolution, Resolution, 0);
        renderTexture.wrapMode = TextureWrapMode.Clamp;

        Shader.SetGlobalFloat("_SkillIndicatorOffOn", 1);
    }

    public void ReleaseRT()
    {
        DestroyImmediate(renderTexture);
    }
}
这里是整个流程的第一个核心点
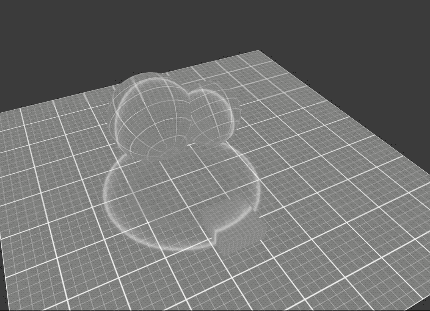
我在每帧OnPreRender阶段刷新这张RT和用于计算uv的viewProjectMatrix,RT创建和删除的时机交给战斗部分,RT的深度是0,TileMode要设置成Clamp,否则会铺满整个模型
这个脚本挂在MainCamera上待机就好
· Shader2
这里是整个流程的第二个核心点,shader本身内容倒是不重要,我就只把流程中涉及到的部分放出吧
vert部分
float4 res = mul(unity_ObjectToWorld, v.vertex);
o.projectorUV =  mul(_ProjectionMatrix, res);
frag部分
float2 uv = (i.projectorUV.xy*5/_SkillIndicatorSize.xy)+0.5;
fixed4 projector = tex2D(_SkillIndicatorMainTex, uv/i.projectorUV.w);
finalColor.rgb =  lerp(finalColor.rgb, projector.rgb, projector.a);
主要是uv的位置校准,直接计算出的i.projectorUV起点是(0,0)点,不论是缩放还是位移都不方便,这里调整到了(0.5,0.5)
完成?
是的,其实还挺简单,这套操作难点不在于操作本身,而是用于实现操作的条件和环境比较特殊
1.这是个手游项目,功能实现以效率优先,这也是为什么不能用Unity自带的Projector
2.项目中所有的环境物体shader统一,不然这套操作就得放在所有需要投射的物体shader上,也不是不行,只是我这里就没这个必要了,提前统一好了
3.效果实现不受功能限制,不能说为了做个贴地,就把效果砍了对吧,上面的Shader1部分就没有限制,美术需要什么做什么就好,而且传入的RT尺寸也可以随时调整,小一些的技能,说不定128也够用,大些的尺寸大不了512嘛
潜在问题
这套操作也不是完全安全的,因为RT的创建销毁和Blit操作在实际设备的GPU中渲染顺序和其他物体的渲染顺序可能会不固定,这就有可能会导致不同的移动端设备表现也许会有不同,需要验证
其他做法
其实如果是小范围的技能预警圈,或者说限定到RTS那种俯视视角的话,可以只使用Shader的Stencil来手动操作渲染层级实现不被遮挡的效果,没必要用上面这套麻烦且不一定稳定的操作,我这里也只是因为是第三人称自由视角,预警圈尺寸也不固定,很容易受到透视影响导致没办法用Stencil来实现